Ever wondered how to wood grain with paint? If you're looking to transform your walls, furniture, or crafts into stunning wooden masterpieces without the hassle of real wood, you're in the right place. Wood grain painting is an incredible technique that can add depth, texture, and warmth to any space. Whether you're a DIY enthusiast or just starting out, this guide will walk you through everything you need to know.
Now, let's be real for a sec. Real wood can be expensive, heavy, and sometimes a pain to work with. But what if you could achieve that same natural beauty using just paint? That’s where wood grain painting comes in. It’s like magic on a budget! With the right tools, techniques, and a bit of patience, you can create realistic wood grain effects that’ll make people do a double-take.
So, why should you bother learning how to wood grain with paint? Well, aside from saving money, it’s also a super fun project that lets you unleash your creativity. Plus, it’s versatile—you can use it on almost any surface, from walls and furniture to decorative items. Stick around, and we’ll dive deep into the world of faux wood finishes. Let’s get those creative juices flowing!
Read also:Unveiling The Truth About Victor Zinck Jrs Married Life And His Wife
Table of Contents
- The History of Wood Grain Painting
- Essential Tools and Materials
- Surface Preparation: The Key to Success
- Wood Grain Painting Techniques
- Exploring Different Wood Grain Styles
- Pro Tips for Beginners
- Cost Comparison: Paint vs Real Wood
- Creative Project Ideas
- Maintaining Your Wood Grain Finish
- Frequently Asked Questions
The History of Wood Grain Painting
You might not realize it, but wood grain painting has been around for centuries. Back in the day, artisans used this technique to mimic expensive woods and create luxurious finishes without breaking the bank. It wasn’t just about saving money, though; it was also about artistic expression. Think of it as the OG version of upcycling!
Wood grain painting gained popularity during the Victorian era, where fancy faux finishes were all the rage. These days, the trend is making a comeback, and for good reason. Modern tools and paints make it easier than ever to achieve professional-looking results. So, whether you’re channeling your inner Victorian craftsman or just trying to spruce up your living room, wood grain painting is here to stay.
Essential Tools and Materials
What You’ll Need to Get Started
Before you dive into how to wood grain with paint, you’ll need the right tools. Don’t worry; most of these are probably already in your toolbox—or at least easy to find at your local hardware store. Here’s a quick rundown:
- Latex or oil-based paint (choose colors based on the wood tone you want)
- A base coat (usually white or light gray)
- A wood grain tool (you can DIY one with a sponge or use a store-bought tool)
- Paintbrushes (various sizes for details)
- Sponges and rags
- Painter’s tape
- Protective gloves
Now, let’s talk about the materials. You’ll want to pick high-quality paints that are durable and easy to work with. If you’re painting furniture, consider using a paint specifically designed for that purpose. For walls, go with something that’s easy to clean and maintain. Trust me, your future self will thank you.
Surface Preparation: The Key to Success
Let’s be honest—no amount of fancy techniques will save a poorly prepared surface. Prepping your workspace is crucial if you want your wood grain painting to look legit. Start by cleaning the surface thoroughly to remove any dust, dirt, or grease. If you’re working with walls, patch up any holes or imperfections with spackling paste.
Once your surface is clean and smooth, apply a primer. This step is non-negotiable! A good primer ensures that your paint adheres properly and creates a uniform base for your wood grain effect. If you’re working with dark surfaces, use a white or light gray primer to help your colors pop. Remember, preparation is half the battle!
Read also:Anna Capri Car Accident The Untold Story You Need To Know
Wood Grain Painting Techniques
The Basics of Creating Realistic Wood Grain
Alright, let’s get into the nitty-gritty of how to wood grain with paint. The process involves layering colors and textures to mimic the natural patterns of wood. Here’s a step-by-step guide:
1. Start with a base coat. This will be the foundation of your wood grain effect. Choose a color that matches the undertones of the wood you’re trying to replicate.
2. Apply the first layer of paint using a sponge or brush. This layer should be slightly darker than your base coat.
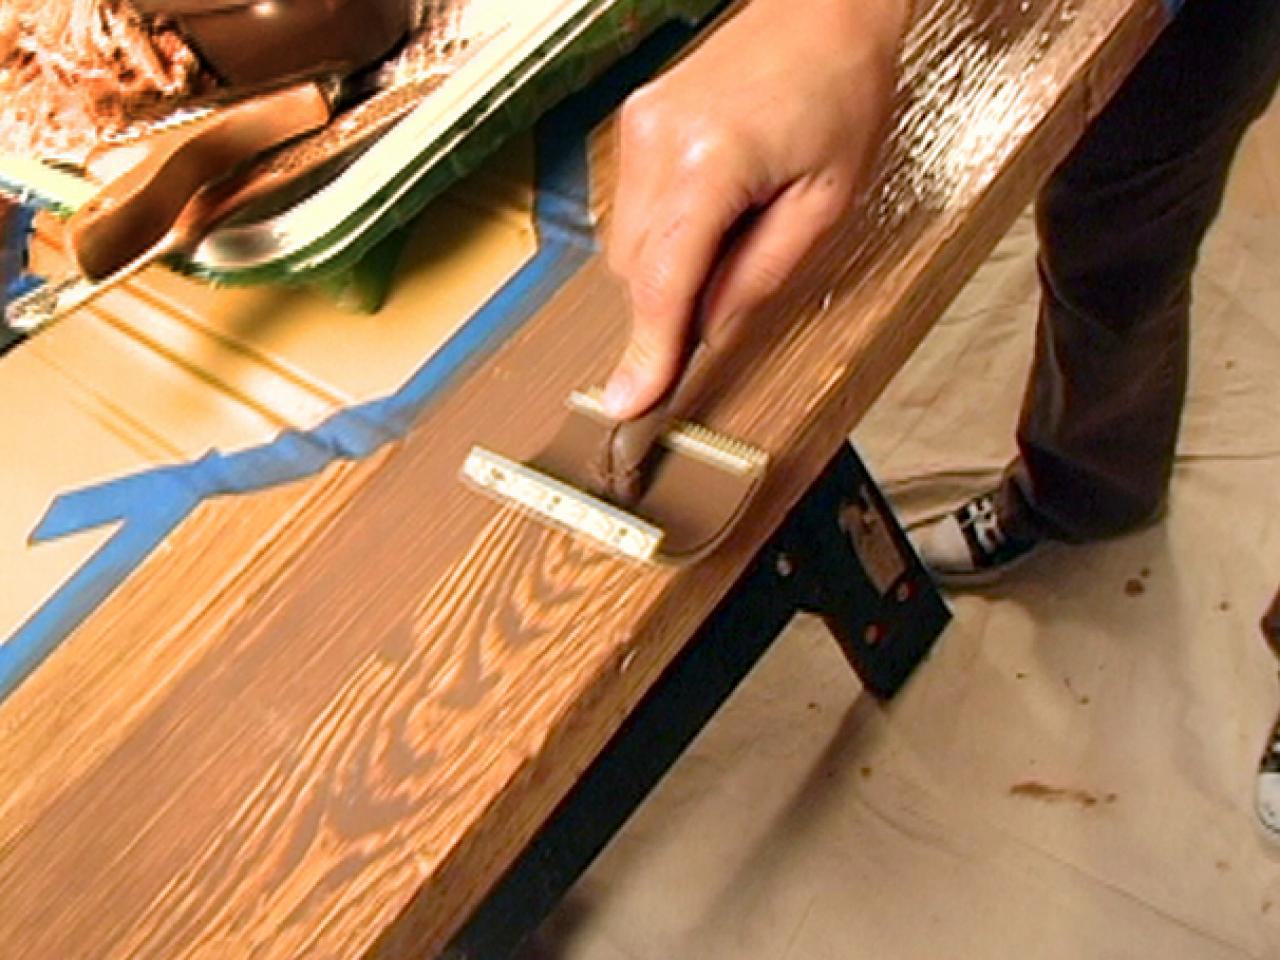
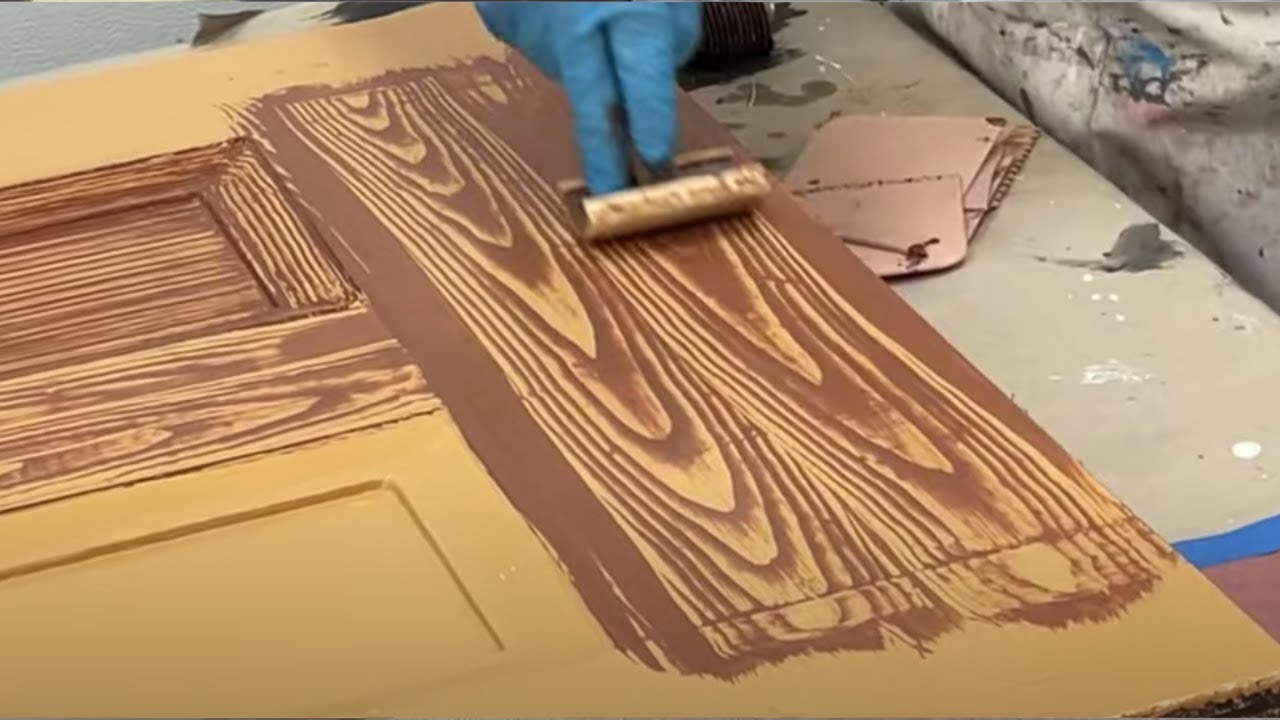
3. Use a wood grain tool to create the grain pattern. Drag the tool across the surface in random, flowing motions to mimic the natural curves of wood.
4. Add details with a small brush. This step involves painting knots, rings, and other imperfections that give wood its character.
5. Finish with a clear sealant to protect your masterpiece. This will also enhance the depth and richness of the wood grain effect.
Exploring Different Wood Grain Styles
Did you know there are tons of different wood grain styles you can create? From classic oak to exotic mahogany, the possibilities are endless. Here are a few popular options:
- Oak: Known for its bold, straight grain pattern, oak is a classic choice for furniture and walls.
- Mahogany: This rich, reddish-brown wood has a smooth, flowing grain that’s perfect for adding warmth to any space.
- Pine: A lighter wood with a more subtle grain, pine is great for creating a rustic or shabby-chic look.
- Cherry: With its deep, reddish tones and intricate grain patterns, cherry wood is a favorite among woodworkers.
Experiment with different colors and techniques to find the style that suits your project best. Who knows, you might even come up with your own unique wood grain design!
Pro Tips for Beginners
As with any new skill, there’s a learning curve when it comes to wood grain painting. Here are a few tips to help you nail it:
- Practice on a small piece of scrap wood before tackling your main project.
- Work in small sections to keep your paint wet and easier to manipulate.
- Use a variety of tools to create different textures and effects.
- Don’t be afraid to make mistakes—they can often lead to unexpected and beautiful results!
Remember, the key to success is patience and practice. The more you experiment, the better you’ll get. And hey, even the pros had to start somewhere!
Cost Comparison: Paint vs Real Wood
One of the biggest advantages of wood grain painting is the cost savings. Let’s break it down:
Real wood can be expensive, especially if you’re covering large areas like walls or floors. On top of that, you’ll need to factor in the cost of installation, sanding, and finishing. With paint, you can achieve a similar look for a fraction of the price.
Plus, paint is much easier to work with. You don’t need any special tools or skills to get started, and you can always touch up or repaint if you’re not happy with the results. It’s a win-win!
Creative Project Ideas
Take Your Wood Grain Painting to the Next Level
Now that you know how to wood grain with paint, it’s time to put your skills to the test. Here are a few project ideas to inspire you:
- Create a stunning wood grain feature wall in your living room.
- Transform old furniture into chic, modern pieces with a faux wood finish.
- Design custom picture frames or mirrors with unique wood grain patterns.
- Update your kitchen cabinets with a warm, wood-like finish.
Let your imagination run wild! The beauty of wood grain painting is that it can be applied to almost any surface. Get creative and see where your newfound skills take you.
Maintaining Your Wood Grain Finish
Once you’ve completed your project, it’s important to take care of it to ensure it lasts. Here are a few maintenance tips:
- Apply a clear sealant to protect your finish from scratches and wear.
- Clean your painted surfaces with a soft cloth and mild soap.
- Avoid using abrasive cleaners or scrubbers that could damage the finish.
- Touch up any chips or scratches as needed to keep your project looking fresh.
A little TLC goes a long way in preserving the beauty of your wood grain painting. Treat it right, and it’ll reward you with years of enjoyment.
Frequently Asked Questions
Got questions? We’ve got answers! Here are some common queries about wood grain painting:
Q: Can I use this technique on outdoor surfaces?
A: Absolutely! Just make sure to use weather-resistant paints and sealants to protect your finish from the elements.
Q: How long does it take to dry?
A: Drying times will vary depending on the type of paint and environmental conditions. Generally, latex paints dry faster than oil-based ones.
Q: Can I use spray paint for wood grain effects?
A: Yes, but it can be tricky to control. If you’re using spray paint, work in a well-ventilated area and practice on a test surface first.
Conclusion
So, there you have it—everything you need to know about how to wood grain with paint. From choosing the right tools and materials to mastering the techniques, this guide has got you covered. Remember, practice makes perfect, so don’t be afraid to experiment and make mistakes along the way.
Now it’s your turn to take action! Whether you’re tackling a small project or going all-out on a major renovation, share your results with us in the comments below. And if you found this article helpful, don’t forget to spread the word by sharing it with your friends. Happy painting, and good luck on your wood grain journey!