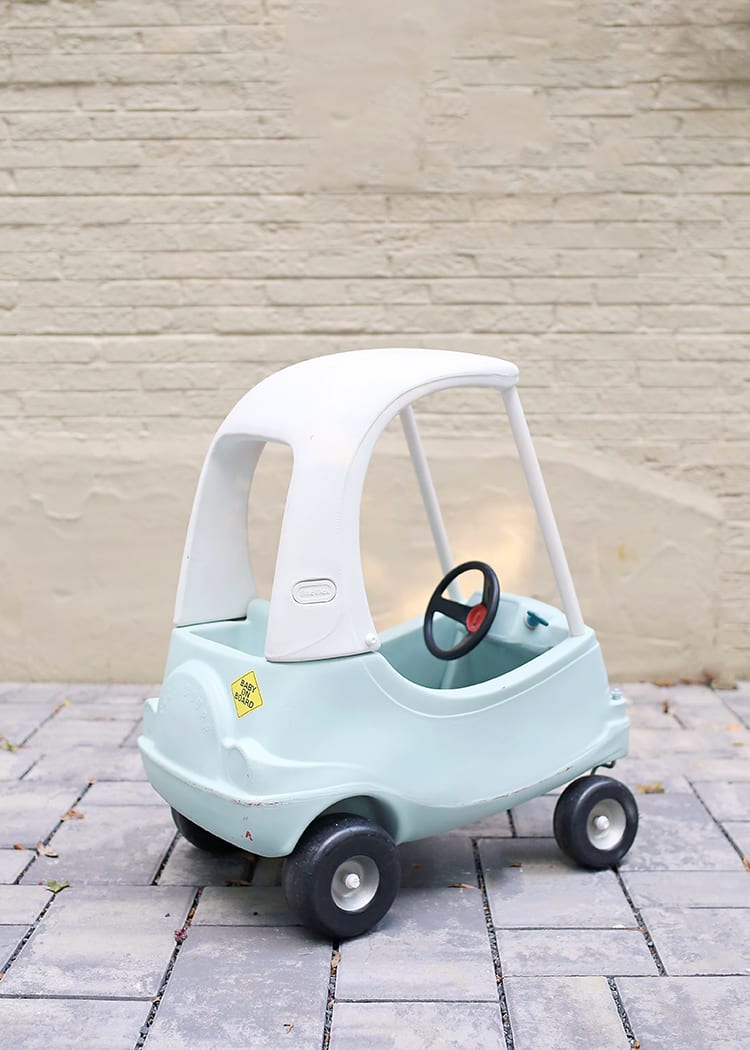
Painting a Little Tikes car can be one of the most rewarding DIY projects you’ll ever take on. Whether it’s for a birthday gift, a special surprise, or just because your kiddo loves customization, this guide will show you exactly how to make that plastic toy car look as good as new—or even better! And hey, who doesn’t love a project that sparks creativity and saves money?
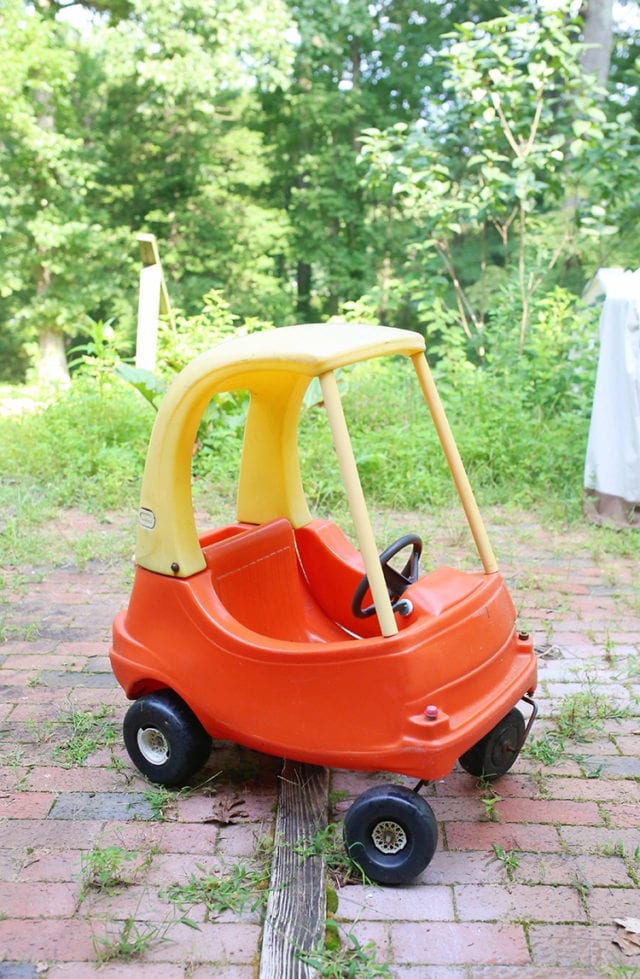
Let’s face it, kids grow out of toys faster than we can keep up with. But instead of throwing away that trusty Little Tikes car when it starts looking a little worse for wear, why not give it a fresh coat of paint? It’s not only eco-friendly but also a great way to bond with your little ones. Plus, it’s way cheaper than buying a brand-new ride-on toy.
Now, if you’re wondering where to start or what tools you’ll need, don’t sweat it. This step-by-step guide will walk you through everything from prepping the car to choosing the right paint and applying the final touches. By the end of this article, you’ll be ready to roll with confidence—and maybe even inspire your kids to join in on the fun!
Read also:Basil Anderson And Lisa Arrindell The Journey Of Love Passion And Influence
So grab a coffee (or tea, if that’s your thing), and let’s dive into how to paint a Little Tikes car like a pro.
Table of Contents
- Prepping the Car for Painting
- Tools and Materials You’ll Need
- Choosing the Right Paint
- Sanding the Surface
- Applying Primer
- Painting the Car
- Adding Creative Designs
- Sealing the Paint
- Pro Tips for a Perfect Finish
- FAQ About Painting Little Tikes Cars
Prepping the Car for Painting
Before you start slapping on the paint, it’s crucial to get the Little Tikes car ready for its transformation. Think of this step as setting the foundation for a masterpiece—you don’t wanna skip it!
First off, clean the car thoroughly. Use warm soapy water and a sponge to remove any dirt, grime, or sticky residue. Trust me, you don’t want those pesky fingerprints or dirt particles messing up your paint job. Once it’s clean, let it dry completely. A damp surface is a recipe for disaster when it comes to painting.
Why Prep Matters
Prepping ensures that the paint adheres properly to the surface. Without a clean and smooth base, your paint might chip or peel off sooner than you’d like. And nobody wants to see their hard work go to waste, right?
Tools and Materials You’ll Need
Now that the car is prepped, let’s talk about the tools and materials you’ll need for this project. Having the right gear makes all the difference in achieving a professional-looking finish.
- Sandpaper (medium grit works best)
- Primer spray (specifically for plastic)
- Acrylic or enamel paint (depending on your preference)
- Paintbrushes or foam brushes
- Painter’s tape
- Clear sealant spray
- Protective gloves
- A well-ventilated workspace
Having all these essentials on hand will save you time and frustration later on. Plus, it’ll make the whole process a whole lot smoother.
Read also:Paula Patton Husband 2024 A Deep Dive Into Her Love Life
Choosing the Right Paint
When it comes to painting a Little Tikes car, not all paints are created equal. You’ll want to choose a paint that adheres well to plastic and can withstand outdoor conditions if the car will be used outside.
Acrylic paint is a popular choice because it dries quickly and is easy to work with. However, if you’re looking for something more durable, enamel paint might be the way to go. It’s a bit trickier to apply, but it provides a tougher finish that’s resistant to scratches and fading.
Pro Tip: Test the Paint First
Before committing to a specific type of paint, do a small test on an inconspicuous area of the car. This will help you see how the paint behaves and whether it needs any extra prep work.
Sanding the Surface
Sanding might sound like a chore, but it’s one of the most important steps in the painting process. By lightly sanding the surface of the Little Tikes car, you create a rough texture that allows the paint to grip better.
Use medium-grit sandpaper to go over the entire surface, paying extra attention to any areas with glossy finishes. Don’t overdo it, though—you just want to create a bit of texture, not strip the car down to its bare bones.
Wipe Down After Sanding
After you’ve sanded the car, make sure to wipe it down again with a damp cloth. This removes any dust or debris that could interfere with the painting process. A clean surface is key to a flawless finish!
Applying Primer
Priming is another essential step that shouldn’t be overlooked. A good primer helps the paint stick better and ensures a smooth, even finish. For plastic surfaces, you’ll want to use a primer specifically designed for plastic materials.
Hold the primer can about 8-10 inches away from the car and spray in even, sweeping motions. Make sure to cover the entire surface, but don’t drench it—you can always add another coat if needed. Allow the primer to dry according to the manufacturer’s instructions before moving on to the next step.
Painting the Car
Now for the fun part—painting! Start by applying a base coat of your chosen paint color. Use long, even strokes to ensure an even coverage. If you’re using spray paint, keep the can moving to avoid drips or uneven patches.
Once the first coat is dry, you can add additional coats for a richer, more vibrant finish. Just remember to let each coat dry completely before applying the next one. Patience is key here!
Using Painter’s Tape for Clean Lines
If you want to add stripes or other designs, painter’s tape is your best friend. It helps create crisp, clean lines without any bleeding. Just make sure to press the tape down firmly before painting.
Adding Creative Designs
Once the base coat is done, it’s time to get creative! Whether you’re going for a classic racing stripe look or something more whimsical, there are endless possibilities for customizing your Little Tikes car.
Here are a few ideas to get you started:
- Add colorful polka dots for a playful touch
- Create flames for a more adventurous vibe
- Paint on your child’s favorite cartoon character
- Use stencils to add geometric patterns
Let your imagination run wild! This is your chance to make the car truly unique and personalized.
Sealing the Paint
Once your masterpiece is complete, it’s time to protect it with a clear sealant. A good sealant will help prevent the paint from chipping or fading over time, especially if the car will be used outdoors.
Choose a sealant that’s suitable for outdoor use and apply it in light, even coats. Allow it to dry completely before letting your little one hop on and take it for a spin.
Pro Tips for a Perfect Finish
Here are a few extra tips to help you achieve a flawless finish:
- Work in a well-ventilated area to avoid inhaling fumes
- Use drop cloths or newspapers to protect your workspace
- Apply thin coats of paint rather than one thick layer
- Be patient—let each layer dry completely before adding the next
Remember, practice makes perfect. If you’re new to painting, don’t be afraid to experiment and learn as you go.
FAQ About Painting Little Tikes Cars
Can I use regular spray paint on a Little Tikes car?
While you can use regular spray paint, it’s better to opt for a paint specifically designed for plastic surfaces. This ensures better adhesion and a more durable finish.
How long does the paint last?
With proper preparation and sealing, the paint can last several years. However, exposure to sunlight and rough play may cause it to fade or chip over time.
Do I need to sand the car before painting?
Yes, sanding is essential for creating a surface that allows the paint to adhere properly. Skipping this step could result in a less-than-perfect finish.
Final Thoughts
Painting a Little Tikes car is a fun and rewarding project that anyone can do with a little bit of time and effort. By following the steps outlined in this guide, you’ll be able to transform your child’s ride-on toy into a personalized masterpiece that they’ll love.
So what are you waiting for? Grab your supplies, put on some music, and get ready to unleash your creativity. And don’t forget to share your results with us in the comments below—we’d love to see your handiwork!
Happy painting, and thanks for stopping by!